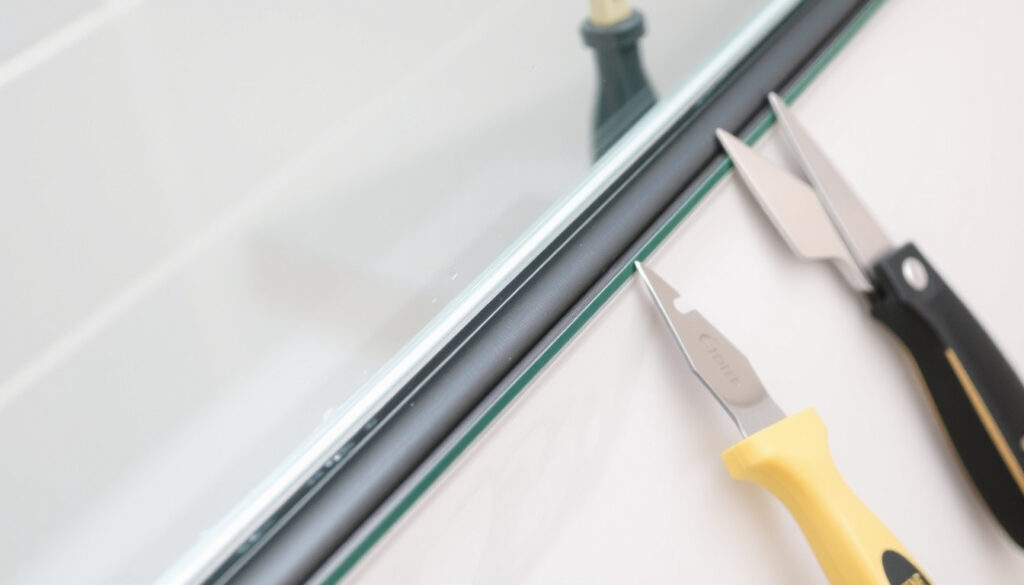
Shower Screen Seal Strip: How to Choose, Replace & Install
Anyone who’s stepped out of a shower into a puddle on the bathroom floor knows the frustration of a worn-out seal. That thin plastic strip at the bottom of your shower screen does more than you think — it keeps water where it belongs. Choosing the right replacement and fitting it properly can save you from mold, slippery floors, and unnecessary repair bills. Here’s how to get it right the first time.
Glass thickness (common): 6 mm (Shower Seals UK) ·
Common materials: PVC, rubber, silicone ·
Installation: DIY-friendly (15–30 min)
Quick snapshot
- Universal seals fit glass 6–12 mm thick (Plano Bath guide)
- New seal snaps onto clean, dry glass (Fab Glass and Mirror tutorial)
- Whether all magnetic seals are universally sized
- Exact lifespan of seal strips (varies by material and usage)
- Average replacement takes 15–30 minutes (HOROW DIY guide)
- Measure your glass thickness and door profile before buying
- Choose between clip-on, magnetic, or adhesive seals
Five quick facts capture the essentials of shower screen seal strips:
| Fact | Value |
|---|---|
| Standard length | 2 m (common retail) |
| Glass thickness range | 6–12 mm |
| Common materials | PVC, rubber, silicone |
| Installation difficulty | Easy (15–30 minutes) |
| Retailer examples | Screwfix, B&Q, Woodies, Glassparts |
How do I choose the right shower seal strip?
Three factors — glass thickness, door type, and seal material — determine whether your new seal will hold water or leak.
What factors should I consider: glass thickness, door type, seal material?
- Glass thickness: Measure the edge of your glass door. Common thicknesses range from 6 mm to 12 mm (Plano Bath guide).
- Door type: Framed doors often use clip-on seals; frameless doors need adhesive or magnetic types.
- Seal material: PVC is durable and cheap; silicone is more flexible and resists mildew.
How to measure your existing seal
Measure length from corner to corner along the glass edge, then note the drop (distance the seal sticks out). Also record glass thickness using callipers or a ruler (Plano Bath guide).
Buying a seal by eyeball instead of by measurement is the most common reason for water leakage after replacement. A gap of even 1 mm lets enough water through to damage floors.
Bottom line: Measure glass thickness and door profile before buying. Shoppers with flat glass: go clip-on. Those with hinged doors: magnetic seals give the tightest closure.
What is the plastic strip at the bottom of a shower screen called?
That strip has several names, but the function is the same: block water from escaping.
Common names: bottom seal, door wipe, drip rail
- Bottom seal – most common term, especially for framed doors (Fab Glass and Mirror tutorial)
- Door wipe – often used for adhesive-backed strips on frameless glass
- Drip rail – a rigid metal or plastic channel that screws onto the door bottom
Materials: PVC, rubber, silicone
PVC is the budget standard, found on most stock seals from retailers like Screwfix and B&Q. Rubber offers slightly better sealing but stiffens in cold. Silicone is the premium choice — it stays flexible and resists mildew longer.
Bottom line: Search for “shower door bottom seal” or “glass door seal strip” — both will take you to the same product category on any DIY site.
Are shower screen seals universal?
The short answer: mostly, but with important caveats.
Universal vs. custom-fit seals
Universal seals claim to fit glass 6–12 mm thick (Plano Bath guide). They work well on straight glass edges. However, for curved or bi-fold screens you may need a multi-fit seal, such as the one sold by Showerdoors.ie.
How to identify if your door needs a specific seal
- If your door has a metal channel, you need a seal that slides in, not one that clips on.
- Magnetic seals are not universally sized — the magnet placement varies by brand.
A universal seal that is “close enough” will still leak. The trade-off between convenience and precision matters most in high-use showers.
How do I replace a shower door bottom seal?
Replacing a bottom seal is a 15-minute job that requires no special skills. Here’s the step-by-step.
Step-by-step removal of old seal
- Grip the old seal at one corner and pull it off by hand. If it’s stuck, use a utility knife to free the first inch — but do not scratch the tempered glass (Plano Bath guide).
- For screw-on rails, remove the screws and slide the old strip out (HOROW DIY guide).
- Clean the glass edge or channel with a damp cloth and mild soap to remove adhesive and mildew (Fab Glass and Mirror tutorial).
Step-by-step installation of new seal
- Dry-fit the new seal: place it along the glass edge without pressing it in. Mark the length, leaving an extra 2 mm (HOROW DIY guide).
- Cut the seal to length using sharp scissors or a craft knife. For metal drip rails, use a hacksaw (Plano Bath guide).
- Starting at one corner, press the seal onto the glass until it snaps into place. Work your way along the door, checking for gaps (Fab Glass and Mirror tutorial).
- If the seal is adhesive-backed, peel the backing in short sections and use soapy water for extra adjustment time (HOROW DIY guide).
Tools needed: scissors, cleaning supplies
- Sharp scissors or utility knife
- Cleaning cloth and mild detergent
- Hacksaw (only for drip rails)
- Soapy water (for adhesive seals)
Bottom line: Clean the channel before installing, cut slightly longer than needed, and press from one end to avoid air gaps. The process works for 9 out of 10 shower doors.
Is it hard to install a shower seal strip?
No — it’s one of the easiest bathroom DIY tasks. But a few common pitfalls can turn a 15-minute job into a leaky mess.
Common challenges: cutting straight, fitting onto curved glass
- Cutting at a slight angle leaves gaps; use a square to guide your cut.
- Curved glass may require a multi-fit seal or a thin adhesive strip that bends without kinking.
Time required: 15–30 minutes
Most DIYers finish in 20 minutes (The DIY Life article). The slowest step is cleaning the glass thoroughly, but skipping it leads to poor adhesion.
A new seal strip costs $5–$15 and takes the same time as a quick shower. Doing it yourself rather than hiring a handyperson saves about £50–£80 per door.
Comparison: Clip-on vs. Magnetic vs. Adhesive seals
Three types dominate the market, each with a distinct trade-off between ease and sealing power.
| Type | Installation | Best for | Average price |
|---|---|---|---|
| Clip-on | Snaps onto glass edge, no adhesive needed | Flat, framed glass doors | $5–$10 |
| Magnetic | Clips on with built-in magnet strip | Hinged doors where tight closure is critical | $10–$20 |
| Adhesive | Peel-and-stick backing, flexible | Curved or uneven glass edges | $8–$15 |
Bottom line: Clip-on is king for simplicity; magnetic for performance; adhesive for awkward shapes. Homeowners with standard framed doors should start with clip-on.
Specifications at a glance
Six key specs you’ll find on product labels — ignore them and you risk buying the wrong fit.
| Spec | Typical range | Notes |
|---|---|---|
| Glass thickness | 6–12 mm | Most universal seals cover this range (Plano Bath guide) |
| Drop (height) | 10–20 mm | Measured from glass edge to seal bottom |
| Length | 1–3 m (common: 2 m) | Cut to size with scissors |
| Channel width | For screw-on rails: 6–8 mm | Measure before buying a rail |
| Fin angle | 90° or 45° | Angled fins help shed water inward |
| Material | PVC, silicone, rubber | Silicone outlasts PVC by ~2 years |
Pros and cons of DIY replacement
Upsides
- Costs £5–£15 instead of £50–£80 for a handyman
- Takes less than 30 minutes
- No special tools beyond scissors
- Can be done immediately, no waiting for an appointment
Downsides
- Wrong measurement leads to leaks
- Poor cleaning reduces adhesion
- Curved or bi-fold doors may need a specialist seal
- Some screw-on rails require drilling pilot holes
What we know for sure — and what’s still fuzzy
Confirmed facts
- Universal seals cover glass thickness 6–12 mm (Plano Bath guide)
- A standard 2-metre seal strip is sold by major retailers
- Installation is straightforward with patience (HOROW DIY guide)
What’s still unclear
- Whether all magnetic seals use the same magnet polarity
- Exact lifespan — depends heavily on water hardness and cleaning frequency
Summary
The right shower screen seal strip is the cheapest insurance against a wet bathroom floor. Measure your glass thickness and door profile before buying, choose a clip-on seal for standard framed doors, and take 20 minutes to install it yourself. For UK homeowners with a door that leaks at the corners, the choice is clear: buy a universal clip-on seal from Screwfix or B&Q, or a magnetic seal for hinged doors — or live with the puddle.
Frequently asked questions
What are the different types of shower screen seals?
The main types are clip-on (snaps onto glass), magnetic (uses magnet strip for tight closure), and adhesive (peel-and-stick for curved edges).
How do I measure for a shower screen seal?
Measure the glass thickness in millimetres, the length of the glass edge, and the drop (height from glass edge to seal bottom). Write all three down before you shop.
Where can I buy shower screen seal strips?
DIY chains like Screwfix, B&Q, and Woodies carry them, as do online specialists such as Glassparts and Shower Seals UK.
Will a universal shower seal work on curved bath screens?
Most universal seals are designed for straight glass. Curved screens often need a multi-fit or adhesive seal that bends without kinking.
What is the best material for a shower seal strip?
Silicone resists mildew and stays flexible longer than PVC or rubber. For budget projects, PVC is fine — expect 2–3 years of use.
How often should I replace my shower door seal?
Every 2–4 years, or sooner if you notice water pooling outside the shower, visible cracks, or mildew stains that won’t clean off.
Related reading
More related posts
 Luton Town Transfer Rumours 2025: Latest News & Signings
 Things to Do in Bath – Top Attractions and Itineraries
 Last Posting Dates For Christmas 2025 – Shipping Guide
 Prince of Persia: The Lost Crown Review – Is It a Flop or a Hit?
 Child Benefit Tax Charge: Thresholds, Rates & Calculators
 Call of Duty Vanguard – Release Date, Campaign and Platforms
 Symptoms of Long COVID – What to Know in 2025
 M. Chinnaswamy Stadium: Pitch, Capacity & 2025 Stampede